In this guide we will learn how to create ci/cd pipeline in Jenkins, build the image , push to local repository and deploy our app to Kubernetes.
I already have Jenkins server installed, if you don’t have one, you can check how to easy install Jenkins.
**You should have some dependencies installed on your k8s node to make this work:
- Jenkins
- git
- k8s container-registry
- openjdk-11-jre
- docker
***You should also have Dockerfile in your github root project, to build/tag/push/deploy your app.
1. Create and configure Jenkins Pipeline
First, let’s start from creating Jenkins Pipeline:
Click on “New item” -> select “Pipeline“, enter the name and click OK.
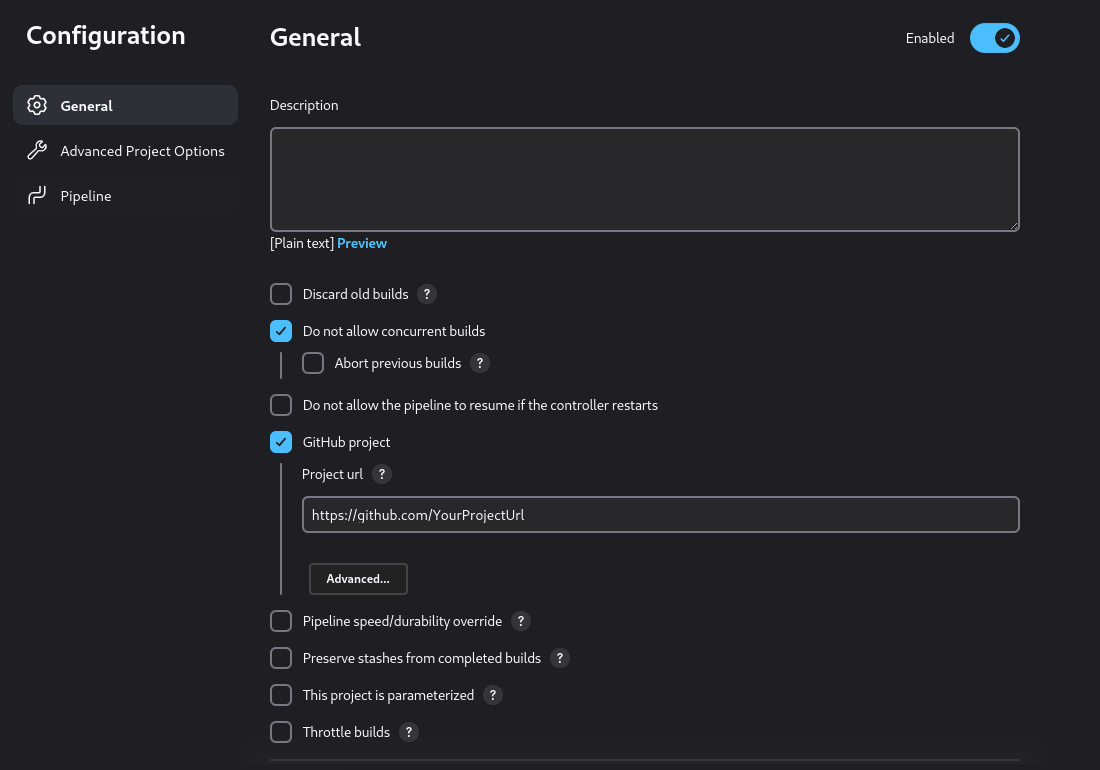
Our pipeline is created, now let’s configure it.
In “General” tab select “Do not allow concurrent build” and “GitHub project” – paste your git project url there.
In the Pipeline tab select Definition “Pipeline script from SCM” -> SCM – Git
Enter in repository field your github project url, set your credentials, specify project branch (*/master) and “Script Path” -> Jenkinsfile
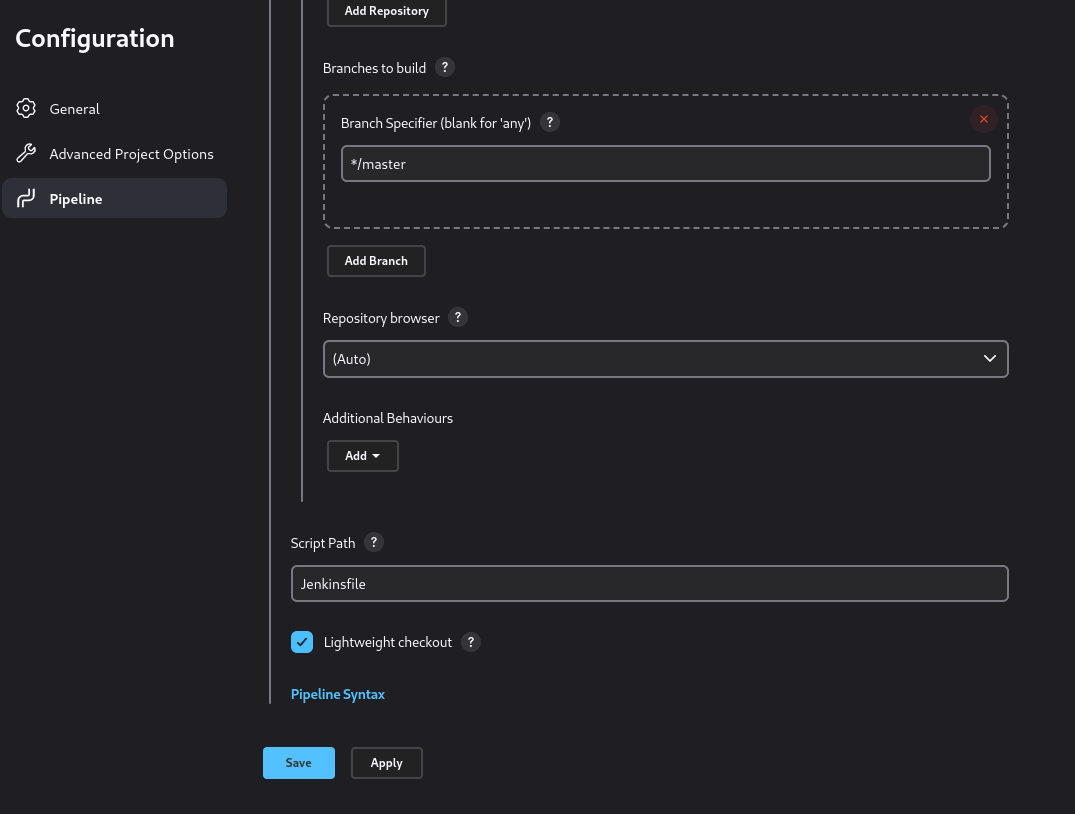 Save and your Pipeline is ready, now we have to create and configure Jenkinsfile and Kubernetes deployment.
2. Create Jenkins file
Jenkinsfile is a text file that contains the definition of a Jenkins Pipeline and is checked into source control. Navigate to your github project to create it. In the root directory (or any other) click on “Add file” -> “Create new file”, the name of the file should be Jenkinsfile, and paste the content below:
pipeline {
    agent {
    node {
        label 'k8s-test-node' //set your kubernetes node
    }
}
   environment {
     ORGANIZATION_NAME = "your github organization name "
     YOUR_DOCKERHUB_USERNAME = "username" (optional)
     SERVICE_NAME = "your project name"
REPOSITORY_TAG="${YOUR_DOCKERHUB_USERNAME}/${ORGANIZATION_NAME}-${SERVICE_NAME}:${BUILD_ID}"
   }

   stages {
     stage('Preparation') {
        steps {
           cleanWs()
         git credentialsId: 'fsdfsdfs-bbb2-46ed-bc92-vbnvjhgfwwef', url: "https://github.com/${ORGANIZATION_NAME}/${SERVICE_NAME}"
        }
   }
  stage('Build') {
     steps {
        sh 'echo No build required for Gateway'
     }
  }

  stage('configFileProvider') {
     steps {
       configFileProvider([configFile(fileId: '1e2d0069-824a-449e-9a3f-9dc704404dad', targetLocation: '/home/root2/jenkins/workspace/workspace/test2'), configFile(fileId: '641db19b-5692-4ada-ac39-da4a996a8ab9', targetLocation: '/home/root2/jenkins/workspace/workspace/test2')]) {
// some block
      }
  }
  }

  stage('Build and Push Image') {
     steps {
       sh 'docker image build -t ${REPOSITORY_TAG} .'
       sh 'docker tag ${REPOSITORY_TAG} localhost:32000/${REPOSITORY_TAG}'
       sh 'docker push localhost:32000/${REPOSITORY_TAG}'
     }
  }

  stage('Deploy to Cluster') {
    steps {
      sh 'envsubst < ${WORKSPACE}/deploy.yaml | microk8s kubectl apply -f -'
    }
  }
 }
}
Now let’s explain every stage in the Pipeline.
- In the agent we select our kubernetes node to build and deploy exactly on that server. This node you can add and setup in Jenkins.
- Set your app ORGANIZATION_NAME, SERVICE_NAME, there’s no need to explain this.
- credentialsId – you can get the id in Jenkins -> Manage Jenkins -> Manage Credentials, find your credential that you setup in Pipeline and copy ID in the id tab, then paste it in Jenkinsfile credentialsId.
- configFileProvider – is optional, it depends on whether your app needs additional config files to run. If you do need it, then go to Jenkins and let’s generate it.
Open your pipeline configuration -> Pipeline Syntax -> Snippet Generator. In the Sample step select wrap: General Build Wrapper, in the build wrapper section select “Provide Configuration file“, select your files from the list, if you don’t have one, then first add it with the help of Config File Management plugin, and press Generate Pipeline script button.
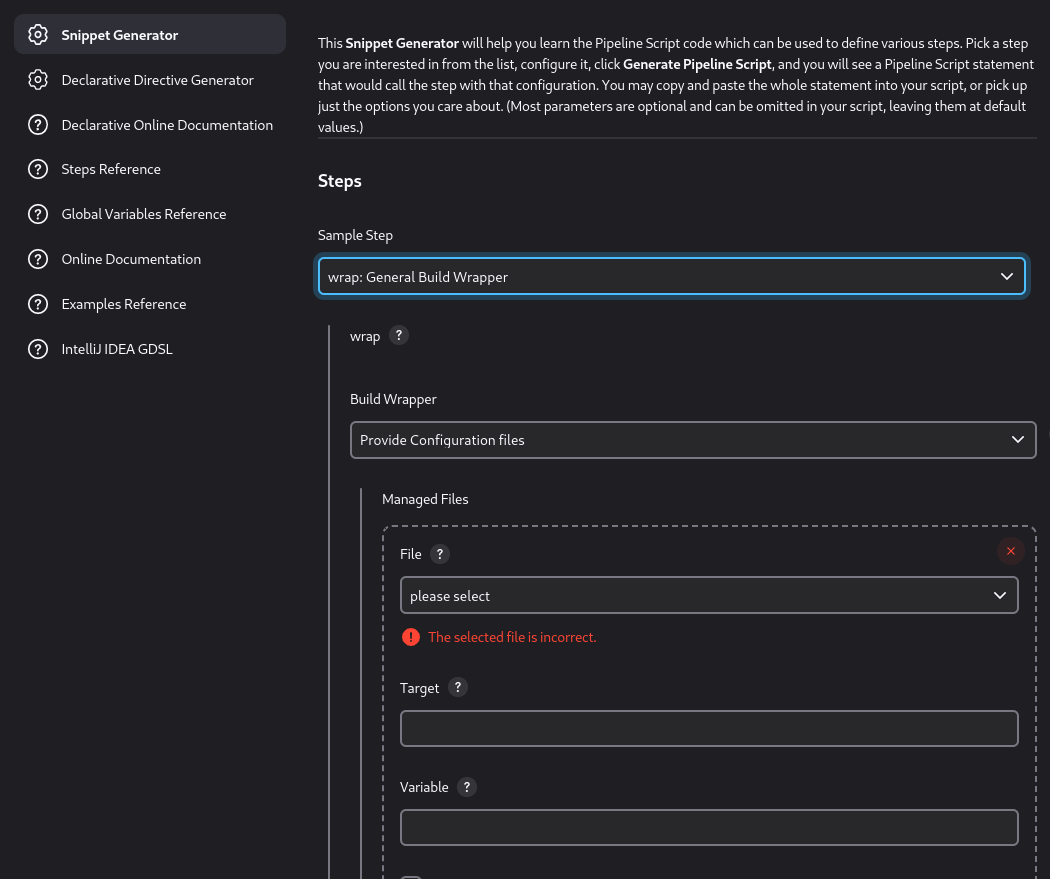
you will get generated stage for your Jenkinsfile. - localhost:32000 – that’s the local kubernetes container registry, where we will push our docker image and then deploy it.
if you use microk8s, you can simply enable it like that:microk8s enable registry
- deploy.yaml – that’s kubernetes deployment file that we gonna create next.
3. Create Kubernetes deployment yaml file
After we created Jenkinsfile it’s time to create k8s deployment file, where we gonna create deployment of our app and service to connect to it.
Create another file in github, call it deploy.yaml and paste the following:
apiVersion: apps/v1
kind: Deployment
metadata:
  name: gateway
  labels:
    app: gateway
spec:
  replicas: 1
  selector:
    matchLabels:
      app: gateway
  template:
    metadata:
      labels:
        app: gateway
    spec:
      containers:
      - name: gateway
      image: localhost:32000/${REPOSITORY_TAG}
      imagePullPolicy: IfNotPresent
      ports:
      - containerPort: 80
---
apiVersion: v1
kind: Service
metadata:
  name: gateway
spec:
  selector:
    app: gateway
  ports:
    - protocol: TCP
    port: 80
    targetPort: 80
    nodePort: 32520
  type: LoadBalancer
  externalIPs:
  - 10.1.0.1 ## your external ip here
Save the file and we are done. Now let’s start our Pipeline.
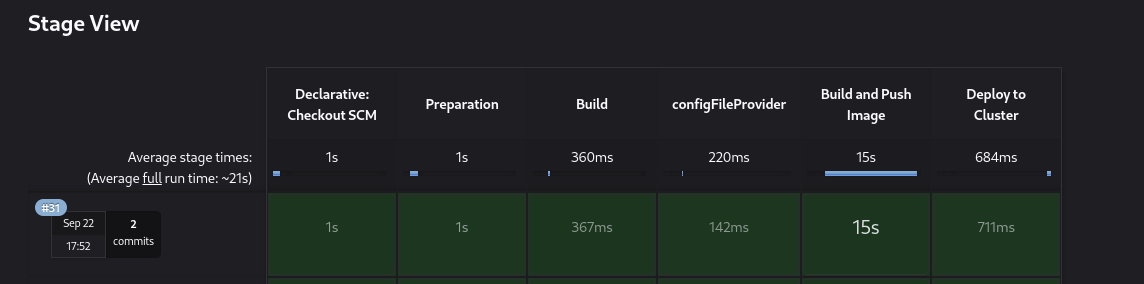
[Pipeline] }
[Pipeline] // stage
[Pipeline] stage
[Pipeline] { (Deploy to Cluster)
[Pipeline] sh
+ envsubst
+ microk8s kubectl apply -f -
deployment.apps/gateway configured
service/gateway unchanged
[Pipeline] }
[Pipeline] // stage
[Pipeline] }
[Pipeline] // withEnv
[Pipeline] }
[Pipeline] // withEnv
[Pipeline] }
[Pipeline] // node
[Pipeline] End of Pipeline
Finished: SUCCESS
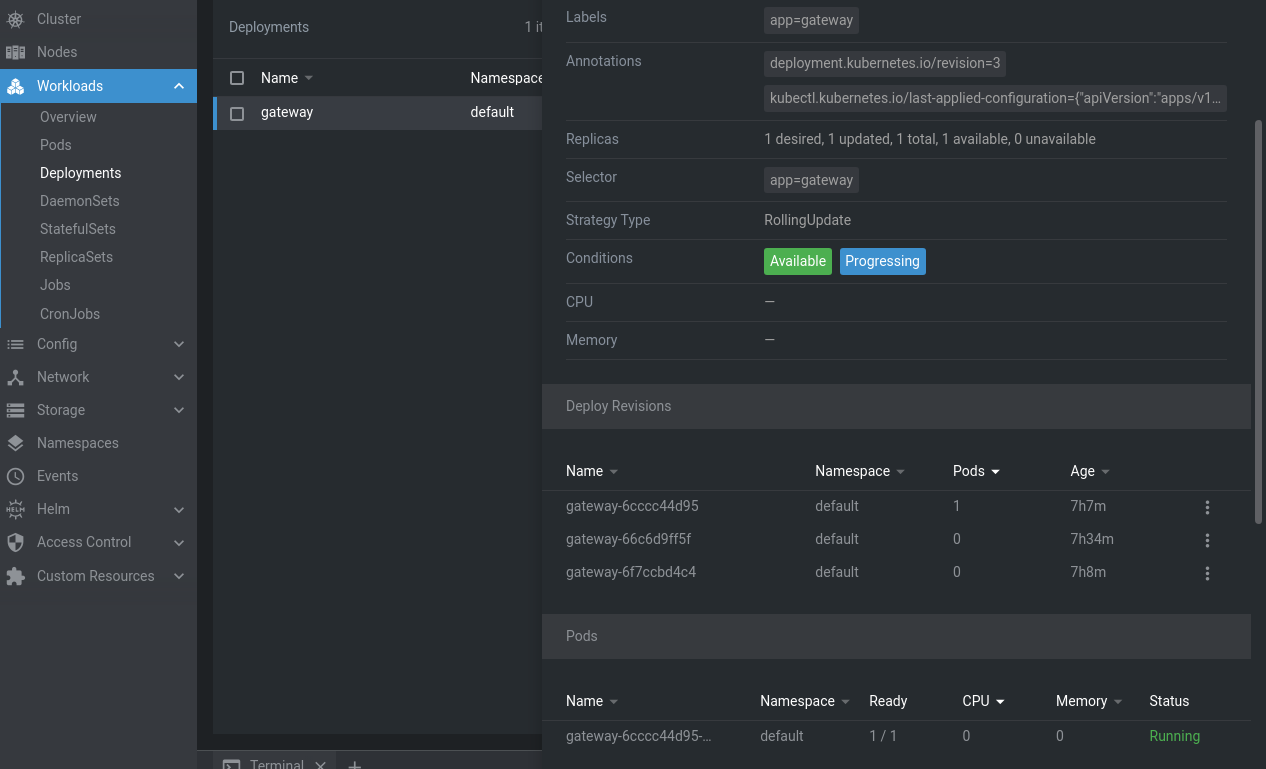
Now let’s check the deployment
kubectl get deployment
![]()
**You should have some dependencies installed on your k8s node to make this work:
- Jenkins
- git
- k8s container-registry
- openjdk-11-jre
- docker