
We are going to check how to configure Jenkins to build Docker Images based on a Dockerfile. Below are the steps of how you can use Docker within a CI/CD pipeline, using Images as a build artifact that can be promoted to different environments and finally production.
Step #1 : Install Jenkins
First of all we are going to install Jenkins on a Debian server. It’s super easy and fast.
We are going to install LTS (Long Term Release) version.
wget -q -O - https://pkg.jenkins.io/debian-stable/jenkins.io.key | sudo apt-key add -
sudo sh -c 'echo deb https://pkg.jenkins.io/debian-stable binary/ > \
    /etc/apt/sources.list.d/jenkins.list'
sudo apt-get update
sudo apt-get install jenkins
Installation of Java
Jenkins requires Java in order to run.
To install the Open Java Development Kit (OpenJDK) run the following:
- Update the repositories
sudo apt update
- install:
sudo apt install openjdk-11-jdk
- checking installation:
java -version
- the result must be something like:
openjdk version "11.0.9.1" 2020-11-04
OpenJDK Runtime Environment (build 11.0.9.1+1-post-Debian-1deb10u2)
OpenJDK 64-Bit Server VM (build 11.0.9.1+1-post-Debian-1deb10u2, mixed mode, sharing)
- Run Jenkins:
systemctl start jenkins
systemctl staus jenkins
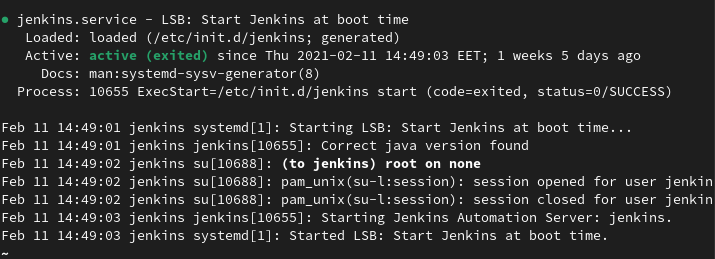 Jenkins is up and running.
Unlocking Jenkins
When you first access a new Jenkins instance, you are asked to unlock it using an automatically-generated password.
- Browse to
http://localhost:8080(or whichever port you configured for Jenkins when installing it) and wait until the Unlock Jenkins page appears.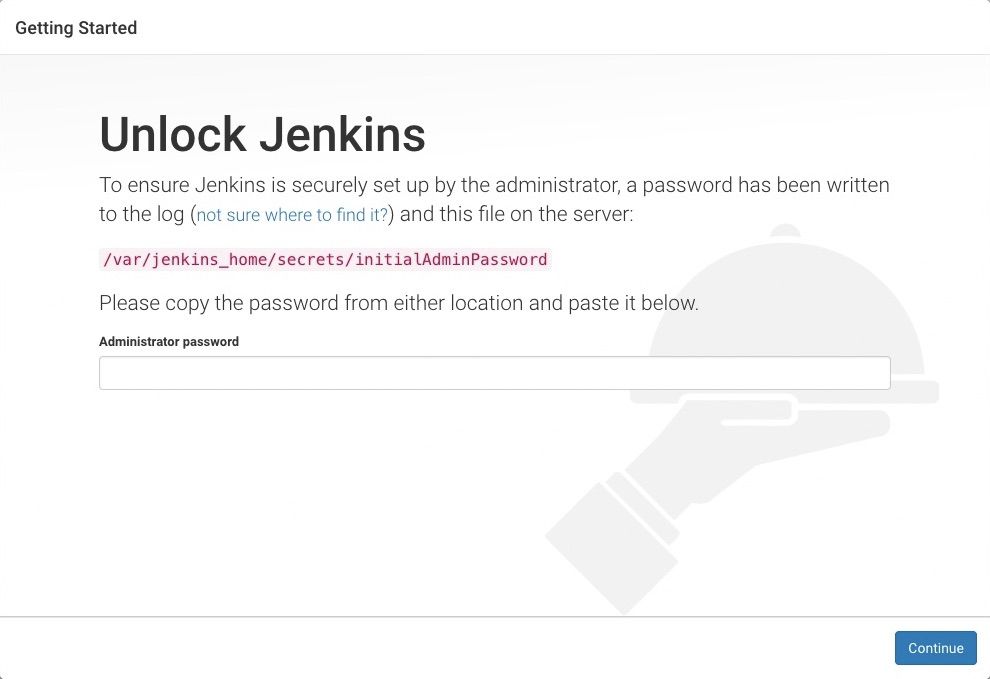
- From the Jenkins console log output, copy the automatically-generated alphanumeric password (between the 2 sets of asterisks).
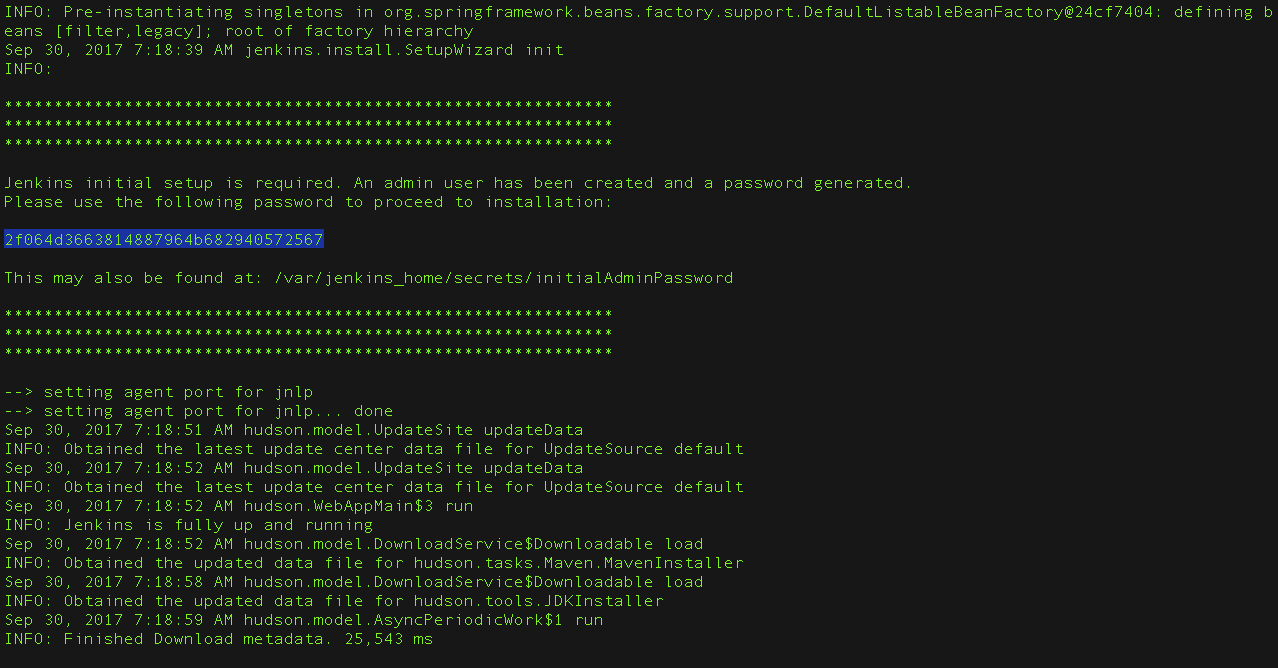
Note:- The command:
sudo cat /var/lib/jenkins/secrets/initialAdminPasswordwill print the password at console. - If you are running Jenkins in Docker using the official
jenkins/jenkinsimage you can usesudo docker exec ${CONTAINER_ID or CONTAINER_NAME} cat /var/jenkins_home/secrets/initialAdminPasswordto print the password in the console without having to exec into the container.
- The command:
- On the Unlock Jenkins page, paste this password into the Administrator password field and click Continue.
Step #2 : Configure the plugins
- Once you are inside the Jenkins Dashboard, select Manage Jenkins on the left.
- On the Configuration page, select Manage Plugins.
- Manage Plugins page will give you a tabbed interface. Click Available to view all the Jenkins plugins that can be installed.
- Using the search box, search for Github plugin. There are multiple Docker plugins, select Github plugin using the checkbox.
- While on this page, install the Git plugin for obtaining the source code from a Git repository.

- Click Install without Restart at the bottom.
The plugins will now be downloaded and installed. Once complete, click the link Go back to the top page.
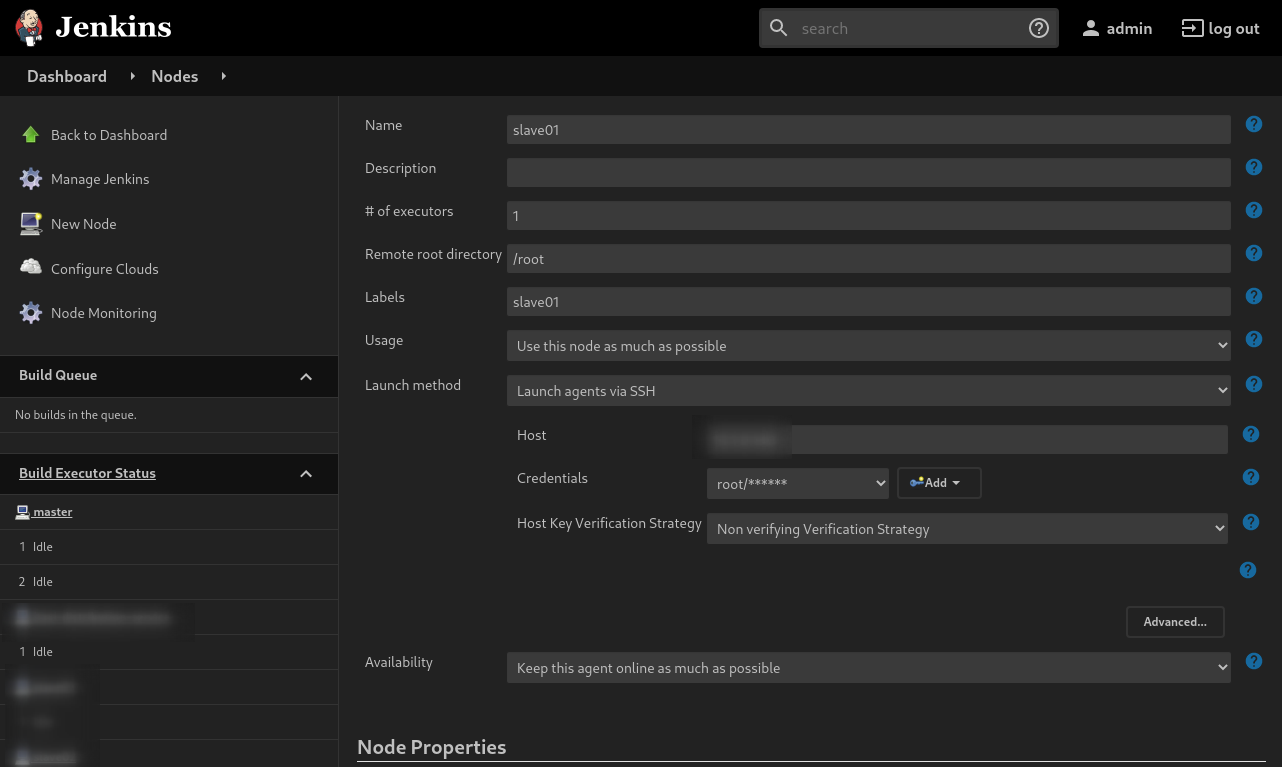
Step #3 : Add new Node for docker deployment
Step 1: On Jenkins master go to Manage Jenkins > Manage Nodes.
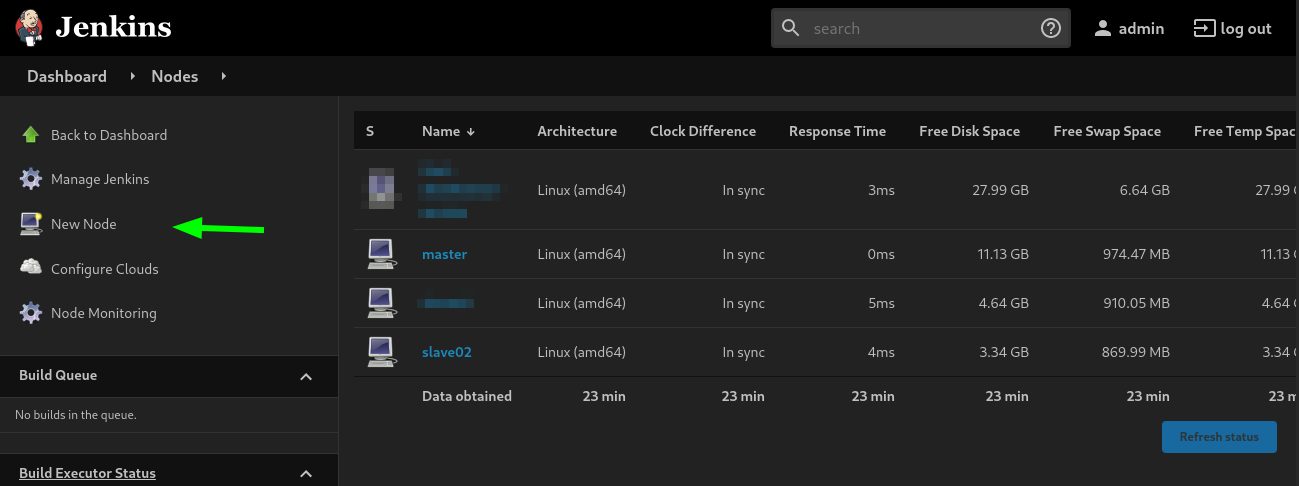
Step 2: Select New Node and enter node name.
Step 3: select Permanent Agent -> Press OK.
Step 4: On the next page, fill in the following fields:
Set a number of executors (one or more) as needed. Default is 1.
Set a Remote FS Root, a home directory for the master on the agent machine, e.g., “/root”
Set Usage to “Use this node as much as possible”.
Set Availability, –> Keep this agent online as much as possible.
Set Labels , it’s easier to use name of the node in this case
Set Launch method – Launch agents via SSH
- enter host ip or domain name
- add new credentials for this host
- set Host Key Verification Strategy to Non verifying verification strategy
Press Save.
Step #4 : Create and configure new CI/CD job
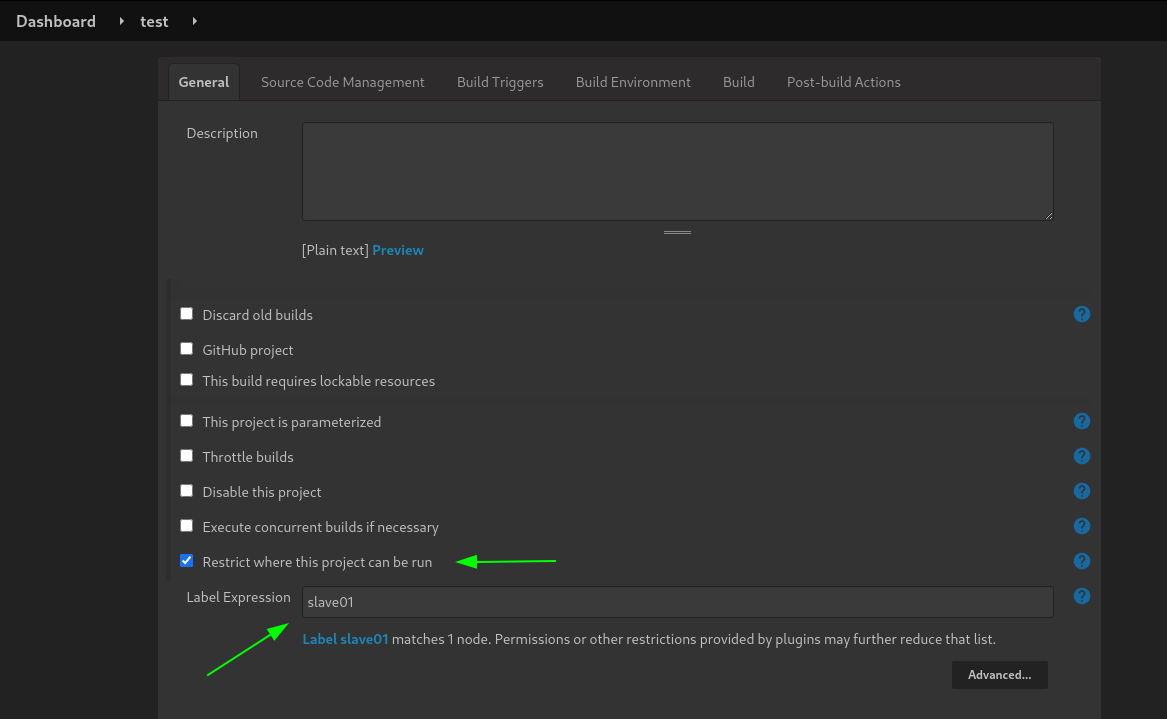
- On the Jenkins dashboard, select Create new jobs of type Freestyle project & create new job ex. test.
- The build will depend on having access to Docker. Using the “Restrict where this project can be run” we can define the label we set of our configured Docker agent. The set “Label Expression” to slave01. You should have a configuration of “Label is serviced by no nodes and 1 cloud”.
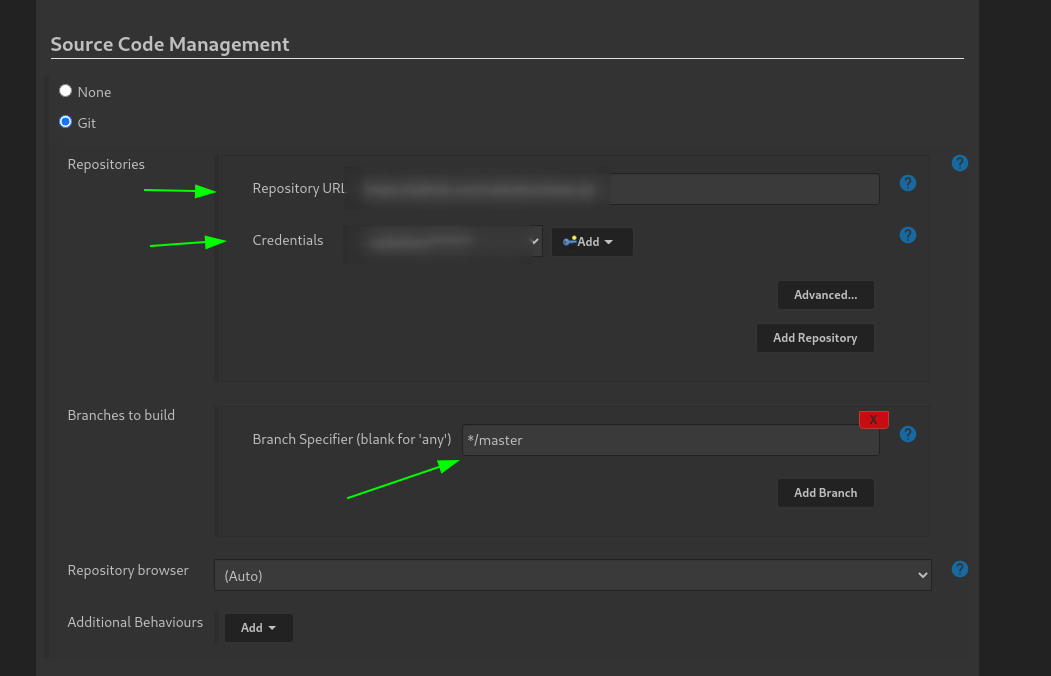
- Select the Repository type as Git and set the Repository
add Github credentials and set the branch to build
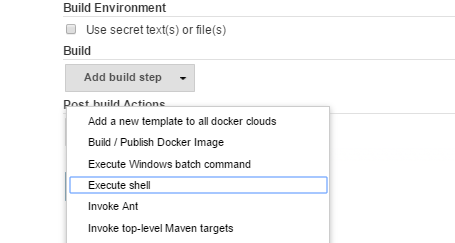
 4. We can now add a new Build Step using the dropdown. Select Execute Shell.
5. Dockerfile takes care of build, Jenkins only needs to call build and specify a friendly name.
Build step :
imageName=test:${BUILD_NUMBER}
containerName=test

docker system prune -af
docker build -t $imageName .
docker stop $containerName || true && docker rm -f $containerName || true
docker run -p 3000:3000 -d --name $containerName $imageName
Dockerfile:
FROM mcr.microsoft.com/dotnet/sdk:5.0-buster-slim AS build

WORKDIR /app
ADD . /app/

EXPOSE 3000

RUN dotnet build

WORKDIR /app/Core.Application/

ENTRYPOINT ["dotnet", "run", "Core.Application.dll"]
6. Click save and press Build now.
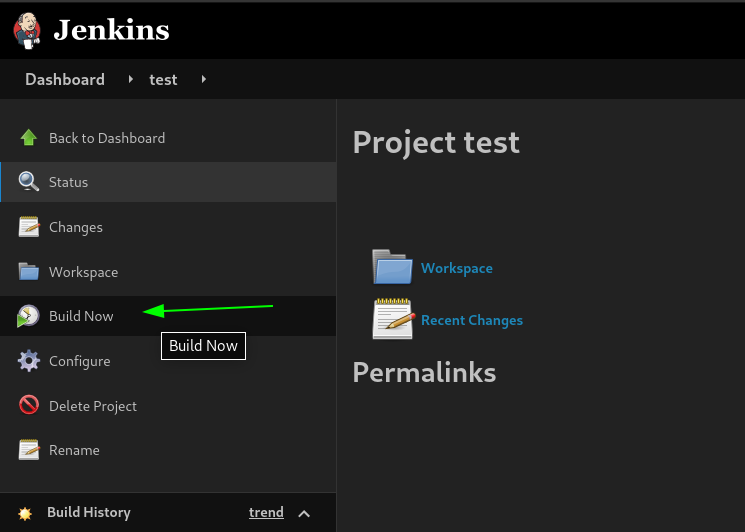
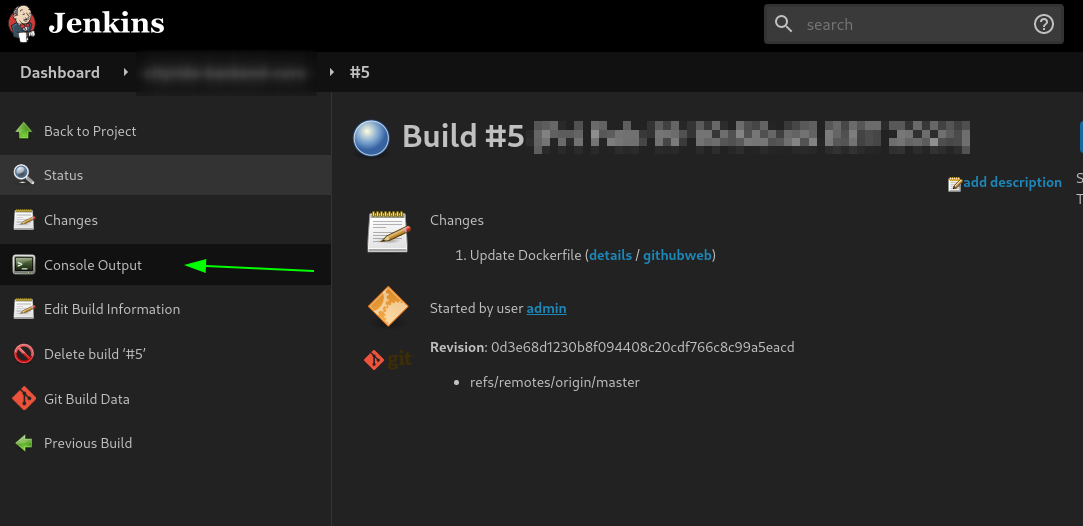
To monitor all the process, you can enter a build process and press Console Output
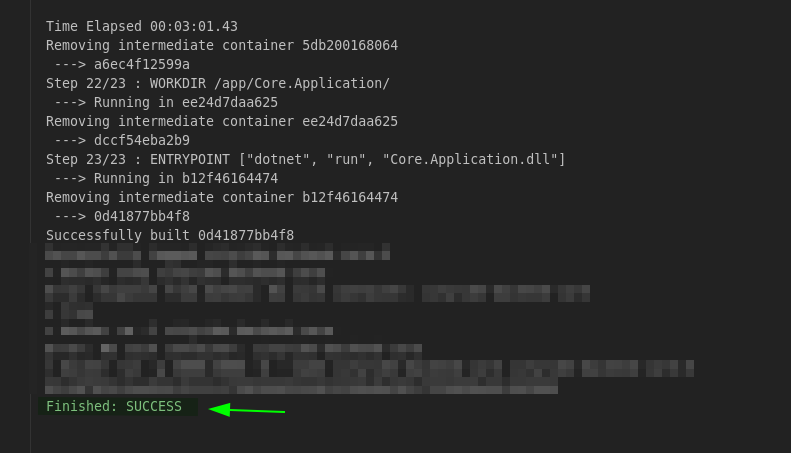
Everything went fine and now we have a deployed docker container on our SLAVE01 node, just go and check it
