Last updated on April 11, 2023
Apache Kafka is a popular distributed messaging software broker designed to efficiently manage large amounts of data in real time. The Kafka cluster is not only scalable and error resistant, but has a much higher throughput compared to other message brokers such as ActiveMQ and RabbitMQ. Although it is commonly used as a publisher / subscriber messaging system, many organizations also use this broker to aggregate logs, as it provides reliable storage for published messages.
The publisher/subscriber messaging system allows one or more manufacturers to publish messages without regard to the number of consumers or how these consumers will process the messages. Subscribed customers are automatically notified of updates and the creation of new messages. This system is more efficient and scalable than systems where customers periodically poll to determine if new messages are available.
The first thing you should always do is update your system. You can do so by running the following commands:
apt-get update && apt-get upgrade
Install the default JDK
Run the following command:
apt-get install default-jdk
And that’s it.
Step 1 – Create a user for Kafka
Since Kafka can process requests over the network, you should create a special user for it. This will reduce the damage to your Ubuntu machine if the Kafka server is compromised. We will create a special user kafka at this step, but you need to create another user without root privileges to perform other tasks on this server after completing the configuration of Kafka.
Log in using a non-root user with sudo privileges and create a kafka user using the command useradd:
sudo useradd kafka -m
The -m flag ensures that a home directory is created for the user. This home directory /home/kafka will act as the directory of our workspace to execute the commands described below.
Set the password using the passwd command:
sudo passwd kafka
Add the kafka user to the sudo group using the adduser command to grant him the rights to install Kafka dependencies:
sudo adduser kafka sudo
Your kafka user is ready to go. Log in to your account using the su command:
su -l kafka
Step 2 – Download and extract the Kafka binaries
Let’s download and extract the Kafka binaries to special folders in the kafka user home directory.
First create a directory in /home/kafka called Downloads to save the downloaded data there:
mkdir ~/Downloads
Use wget to download Kafka binaries:
wget "https://www.apache.org/dist/kafka/2.5.0/kafka_2.13-2.5.0.tgz"
Create a directory called kafka and replace it with this directory. It will serve as the base directory for installing Kafka:
mkdir ~/kafka && cd ~/kafka
Extract the archive you downloaded using the tar command and move it to kafka directory:
tar -xvzf ~/Downloads/kafka_2.13-2.5.0.tgz
mv /home/kafka/Downloads/kafka_2.13-2.5.0/* /home/kafka/kafka/
Now that we have downloaded and extracted the binaries, we can proceed to configure Kafka.
Step 3 – Configure Kafka Server
Kafka’s default behavior does not allow us to delete the name of the topic, category, group or branch where the posts were posted. To change this, we will modify the configuration file.
Kafka configuration options are listed in server.properties file. Open the file in nano or your favorite editor:
nano ~/kafka/config/server.properties
Let’s add a setting that allows us to remove Kafka themes. Add the following line at the bottom of the file:
delete.topic.enable = trueStep 4 – Creating the systemd.unit Files and Starting the Kafka Server
In this step, we will create the systemd.unit files for the Kafka service. This will help us perform actions such as starting, stopping, and restarting Kafka in a manner compatible with other Linux services.
Zookeeper is a service that Kafka uses to manage cluster status and configurations. It is widely used in many distributed systems as an integral component.
Create a unit file for zookeeper:
sudo nano /etc/systemd/system/zookeeper.service
Type the following unit definition in the file:
[Unit]
Requires=network.target remote-fs.target
After=network.target remote-fs.target

[Service]
Type=simple
User=kafka
ExecStart=/home/kafka/kafka/bin/zookeeper-server-start.sh /home/kafka/kafka/config/zookeeper.properties
ExecStop=/home/kafka/kafka/bin/zookeeper-server-stop.sh
Restart=on-abnormal

[Install]
WantedBy=multi-user.target
Then create a system service file for kafka:
sudo nano /etc/systemd/system/kafka.service
Type the following unit definition in the file:
[Unit]
Requires=zookeeper.service
After=zookeeper.service

[Service]
Type=simple
User=kafka
ExecStart=/bin/sh -c '/home/kafka/kafka/bin/kafka-server-start.sh /home/kafka/kafka/config/server.properties > /home/kafka/kafka/kafka.log 2>&1'
ExecStop=/home/kafka/kafka/bin/kafka-server-stop.sh
Restart=on-abnormal

[Install]
WantedBy=multi-user.target
After defining all units, launch Kafka using the following command:
sudo systemctl start kafka
To verify that the server has started successfully, check the log files for the kafka unit:
sudo journalctl -u kafka
You now have a Kafka server that is connected to port 9092.
To activate kafka startup when the server boots up, run the following command:
sudo systemctl enable kafka
Step 5 – Testing the Installation
~/kafka/bin/kafka-topics.sh --create --zookeeper localhost:2181 --replication-factor 1 --partitions 1 --topic TutorialTopic
echo "Hello, World" | ~/kafka/bin/kafka-console-producer.sh --broker-list localhost:9092 --topic TutorialTopic > /dev/null
~/kafka/bin/kafka-console-consumer.sh --bootstrap-server localhost:9092 --topic TutorialTopic --from-beginning
If there are no configuration problems, you should see Hello, World in your terminal:
Output
Hello, World
That’s it with Kafka, now let’s install Web ui
We will use Kafdrop for our web.
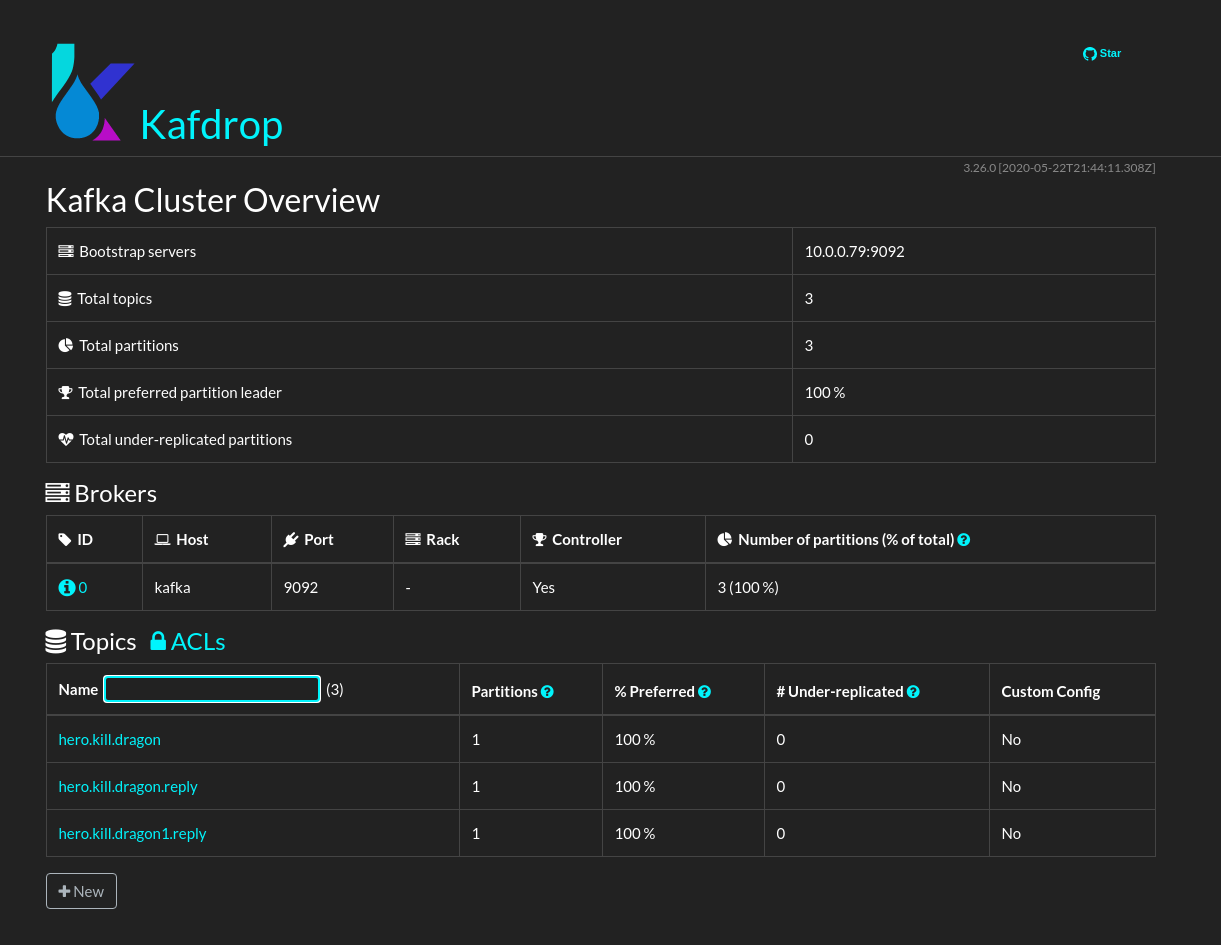
Kafdrop is a web UI for viewing Kafka topics and browsing consumer groups. The tool displays information such as brokers, topics, partitions, consumers, and lets you view messages.
https://github.com/obsidiandynamics/kafdrop.git
First, we need to install docker
Step 1: Update Software Repositories
It’s a good idea to update the local database of software to make sure you’ve got access to the latest revisions.
Open a terminal window and type:
sudo apt-get updateAllow the operation to complete.
Step 2: Uninstall Old Versions of Docker
Next, it’s recommended to uninstall any old Docker software before proceeding.
Use the command:
sudo apt-get remove docker docker-engine docker.ioStep 3: Install Docker
To install Docker on Ubuntu, in the terminal window enter the command:
sudo apt install docker.ioStep 4: Start and Automate Docker
The Docker service needs to be setup to run at startup. To do so, type in each command followed by enter:
sudo systemctl start dockersudo systemctl enable docker
Step 5 (Optional): Check Docker Version
To verify the installed Docker version number, enter:
docker --version
Step 6: Install kafdrop
*Change your_local_IP with your actual IP
docker run --restart=always -it --add-host kafka:your_local_IP -d -p 9000:9000 -e KAFKA_BROKERCONNECT=your_local_IP:9092 -e JVM_OPTS="-Xms32M -Xmx64M" -e SERVER_SERVLET_CONTEXTPATH="/" obsidiandynamics/kafdrop
Then access the web UI at http://localhost:9000.